Below is the documentation for the InPost PrestaShop proprietary plugin. It contains information about the installation and configuration of the plugin
| Panel | ||||||
|---|---|---|---|---|---|---|
| ||||||
1.7+Plugin: (latest version 1.23.0- 08.04.2024r) https://inpost.pl/sites/default/files/2024-04/PrestaShop-1.7.0-1.7.8-ver-1.23.0.zip Our plugin is compatible with PrestaShop version 1.7 and above. Version 1.6 as well as some PHP versions may cause errors in operation of the plugin and the store. Compatibility of PrestaShop version with PHP: https://devdocs.prestashop-project.org/1.7/basics/installation/system-requirements/#php-compatibility-chart Pre-test the plugin on a trial version of the store |
| Panel | ||||||
|---|---|---|---|---|---|---|
| ||||||
8.0+New plug-in version compatible with PrestaShop 8.X Plugin: (latest version 2.8.0- 08.04.2024r) https://inpost.pl/sites/default/files/2023-11/PrestaShop-8.-ver-2.7.0.zip |
Changelog:
| Expand | ||
|---|---|---|
| ||
|
Na tej stronie
| Table of Contents |
|---|
Plugin installation
Log in to your store's admin panel on the PrestaShop platform
Go to Modulestab
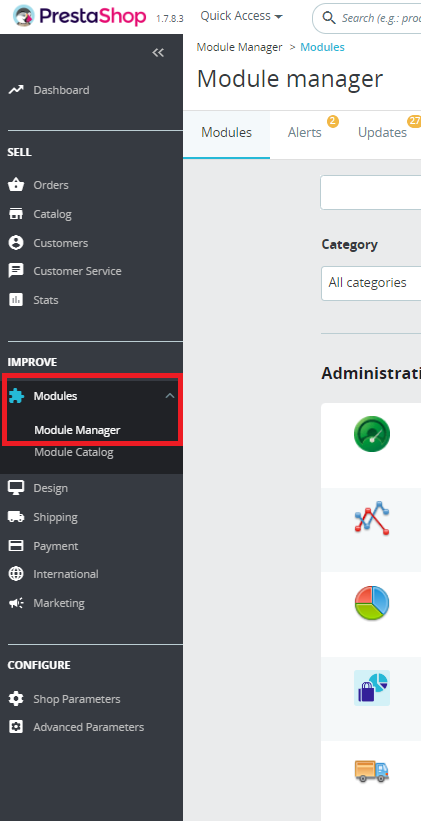
2. On the Modules tab, select Module Manager
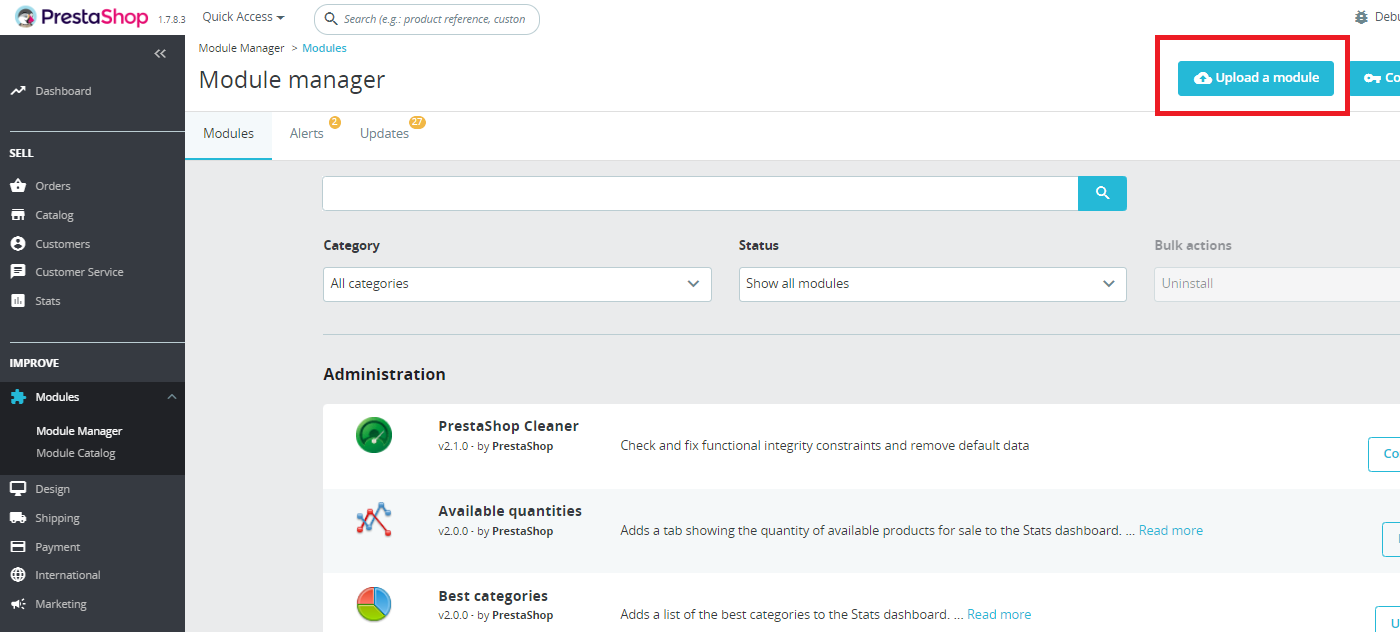
3. On the right side of the screen you will see the Upload a module button
(Click on the button and upload the installation package as an Archive)
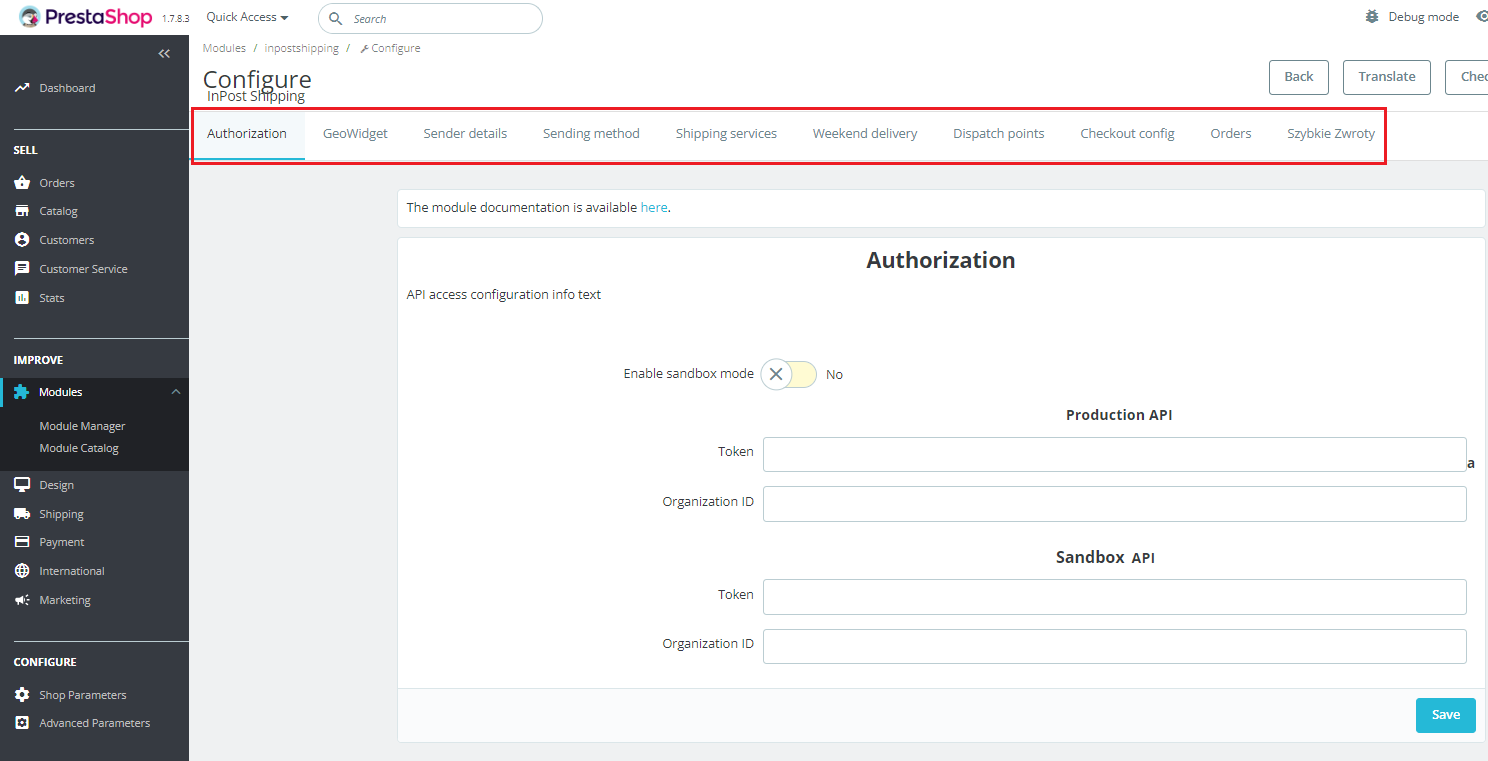
Authorization
Here you can fill in your API access data (Token, Organization ID), which you can generate yourself in the Parcel Manager under "API" Access to environments is at the beginning of this documentation
It is possible to use only Sandbox mode after switching the switch and completing the sandbox data
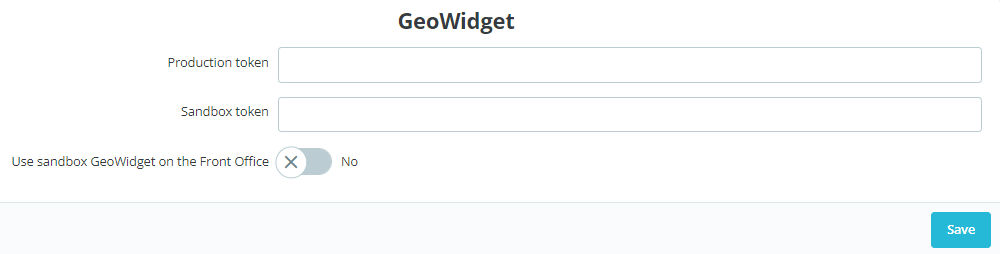
Geowidget
For proper operation of the map with InPost points in the shopping cart, you need to add the Geowidget token to the Production or Sandbox configuration.
Generate the token in Parcel Manager under My Account → API → Geowidget (specifying the store domain)
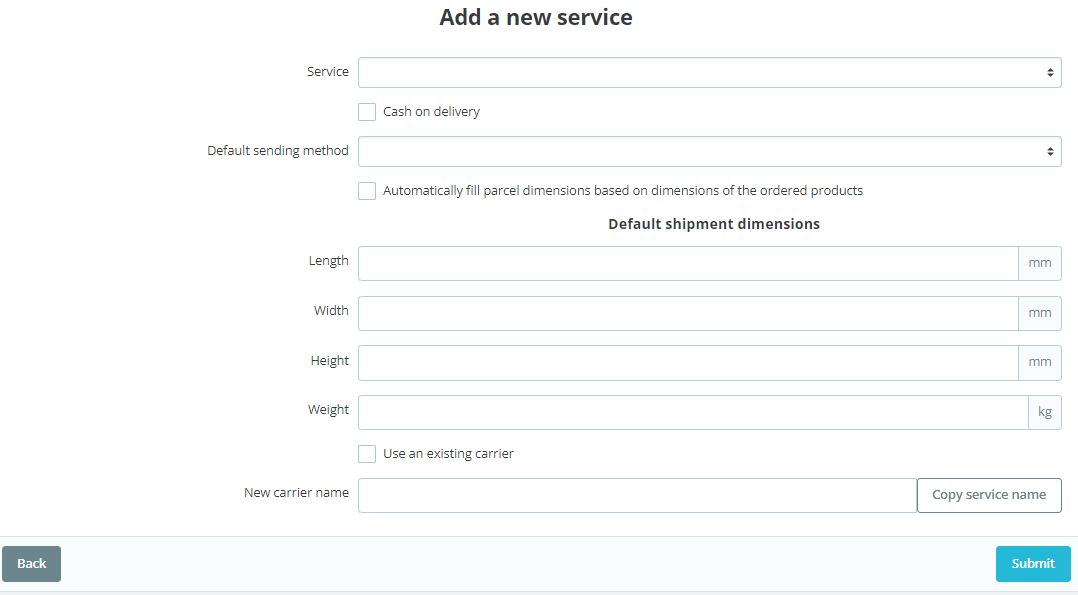
Shipping services
Here you can configure the delivery methods that will appear in your store
Click Add New -> fill in the service that is imported from the API, the default shipping method, specify the default shipment dimensions or gauge ( depending on the service used), then give the correct service name according to the guidelines in the "Poradniku skutecznej implementacji dostaw InPost w koszyku e-commerce" and click Submit
| Info |
|---|
You can find a delivery implementation guide at: |
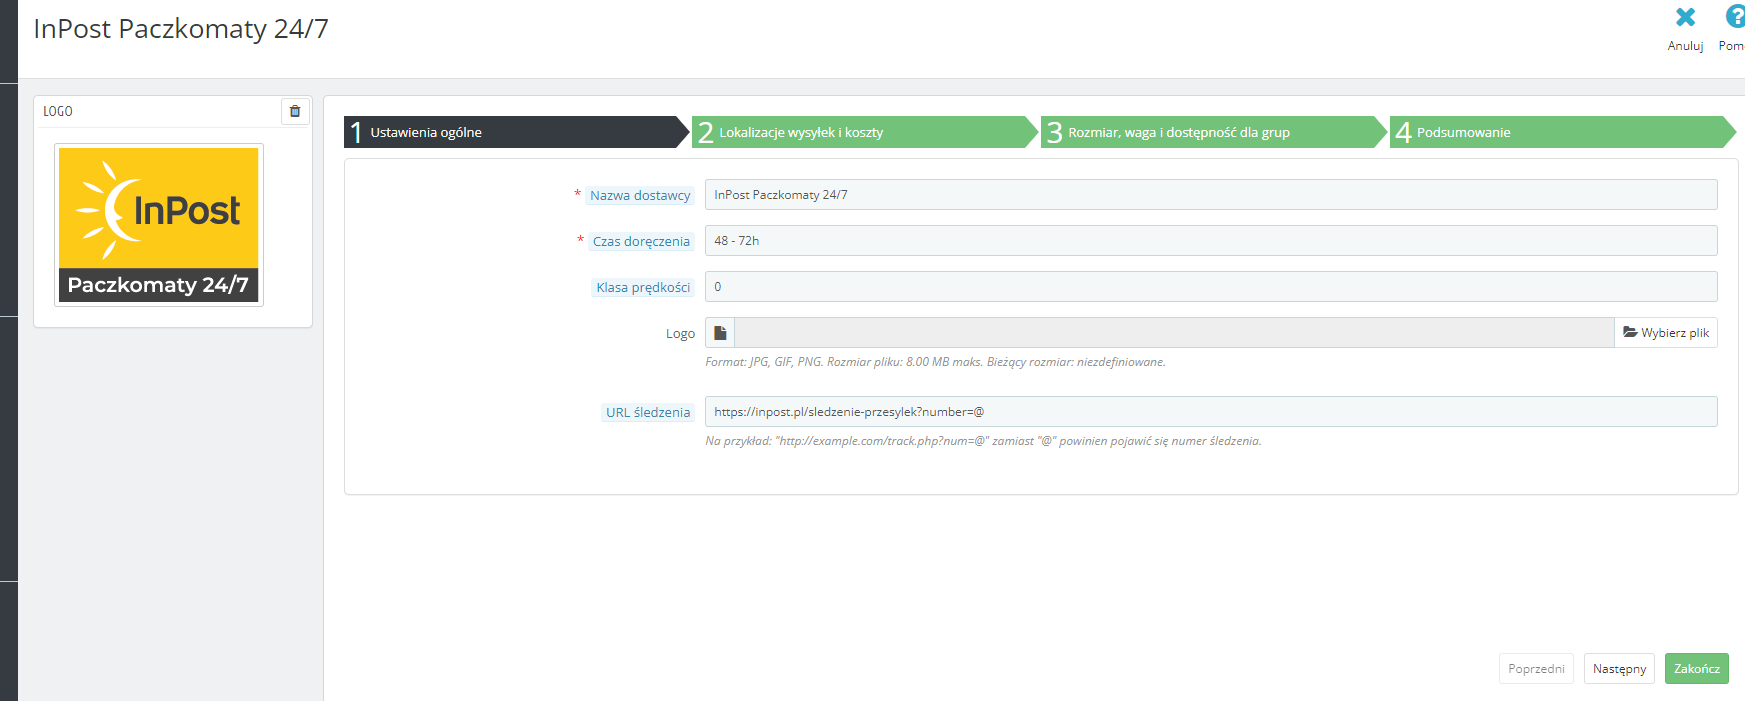
After adding a service, you have the option to further configure the delivery method. To do so, click GO TO DELIVERY SETTINGS
You will be redirected to the selected service, where you can change the logo, set shipping costs, maximum weight, sizes and availability for guests or customers logged into the store
Positioning of delivery services in the shopping cart
Tab Improve -> Shipping -> Carriers
Here's how you can position InPost services in your customer's shopping cart
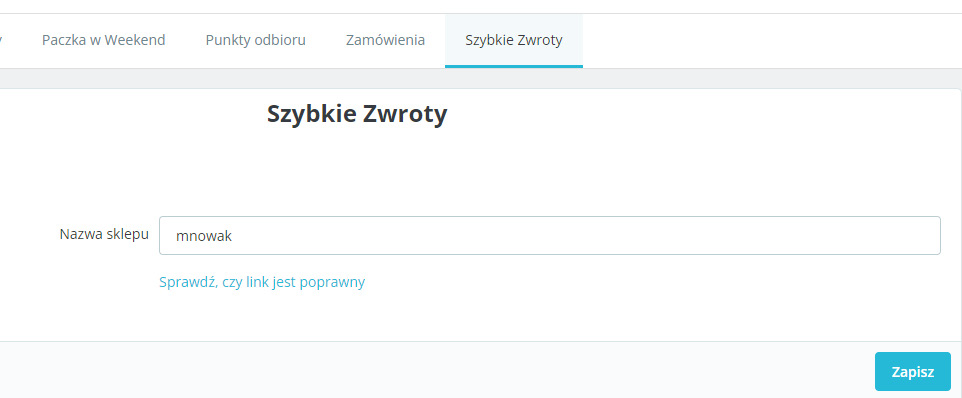
Quick Returns
The service allows customers to return shipments ordered from the store via Parcel Locker
In the plugin configuration, you need to provide a short name for the Fast Returns form. The link is created when you create an account for this service through the Sales Representative
The customer who is logged in to the store in the order tab sees a new Return Merchandise button this allows you to move to your form where he can make a return
| Info |
|---|
Returns made through the form have two acceptance options:
|
Parcel on the Weekend
In order to make the Parcel on the Weekend service available, you need to add a new delivery method.
Go to the module configuration and choose Shipping Services → Add New
Configure the method (by selecting Parcel on Weekend):
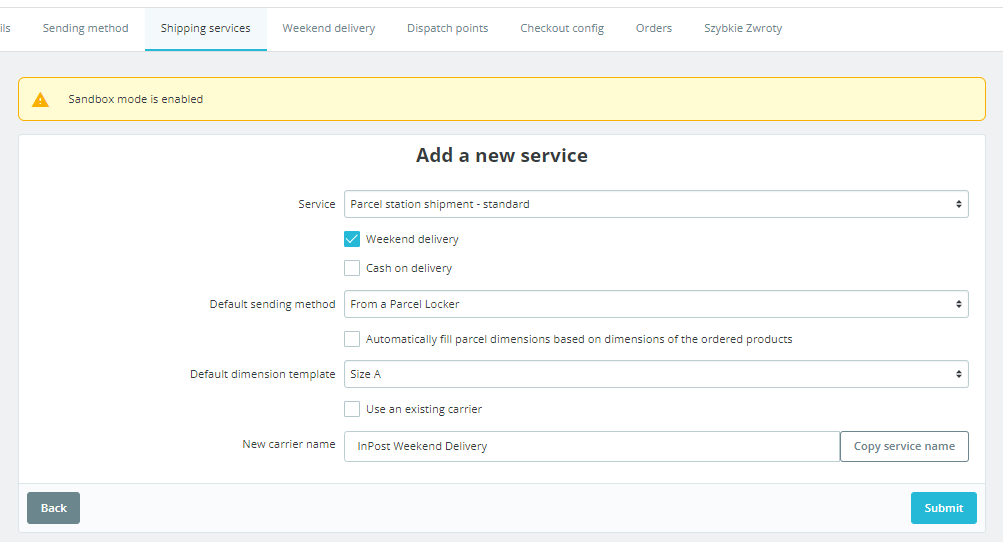
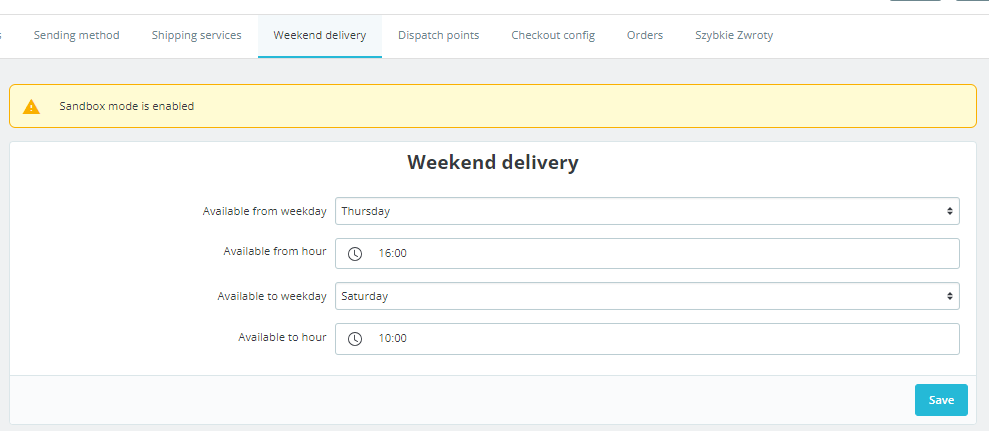
We then set the availability of the service at the checkout on specific days and times:
InPost Locker Economy
Products ordered through the provided InPost Paczkomat® Economy Parcel service get an attractive delivery price. Receiving economy parcels from Paczkomat® InPost is the safest way to carry out online orders, especially with the remote opening of the box through the InPost Mobile application
Configuration:
A new shipping method should be added to the operation of the service
Go to Modules → InPost Shipping → Shipping Services tab
We click Add new
We select the Parcel station shipment - economic
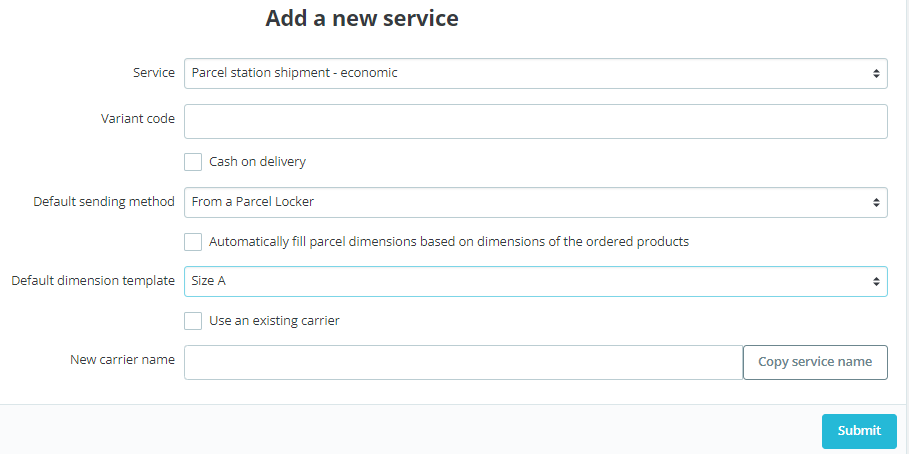
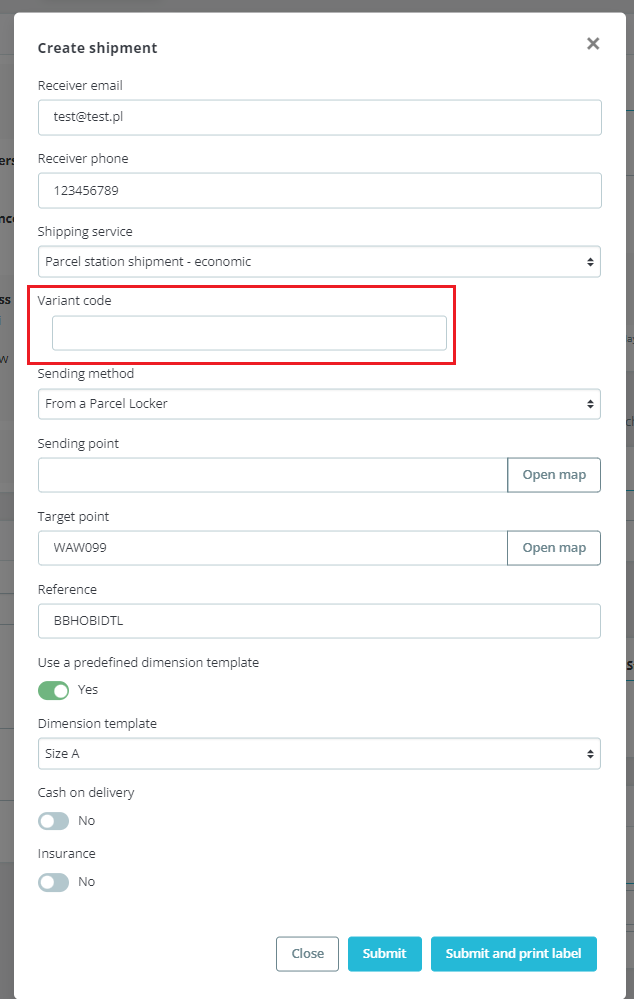
We fill in the standard shipping details and the variant code , which was given on the contract
Click Submit
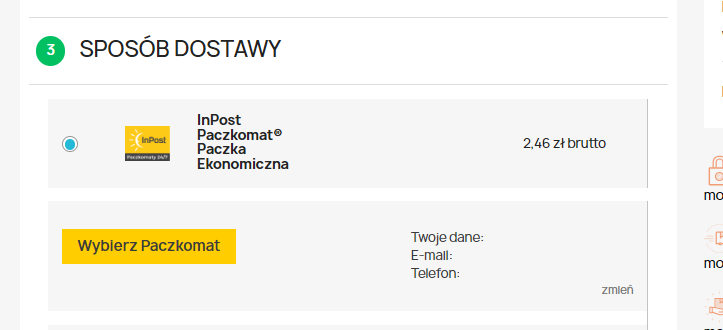
After adding the service, we need to configure it additionally by going to Go to Carrier Settings

There let's set the price for the service, whether the price should include tax and for which groups it should be available
After saving the settings, a new service appears to us in the shopping cart:
Create shippment:
Once the customer has placed an order, the Carriers tab in the order will show which service the customer has selected and a New shipment can be created.
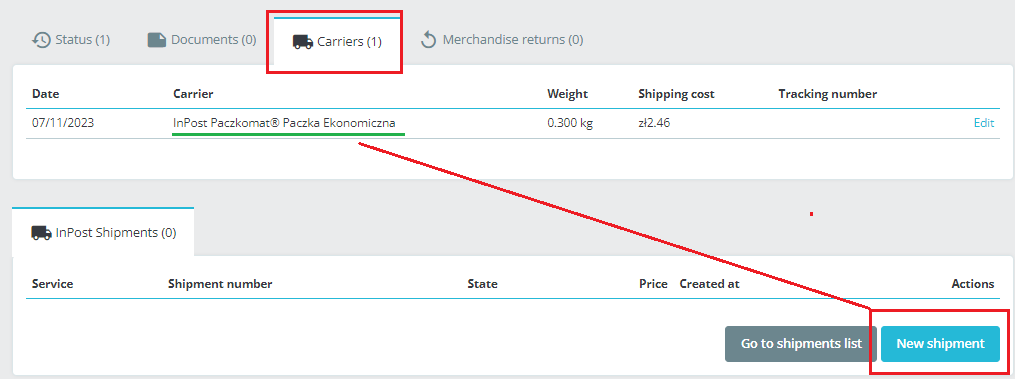
In the place of the Variant code, the value added when adding a new delivery service will be automatically assigned.
Order processing/shipping
Order handling
Tab - Orders
Lets you generate labels, create shipments, print pick-up orders

A table of InPost services appears in the order where we can create a shipment
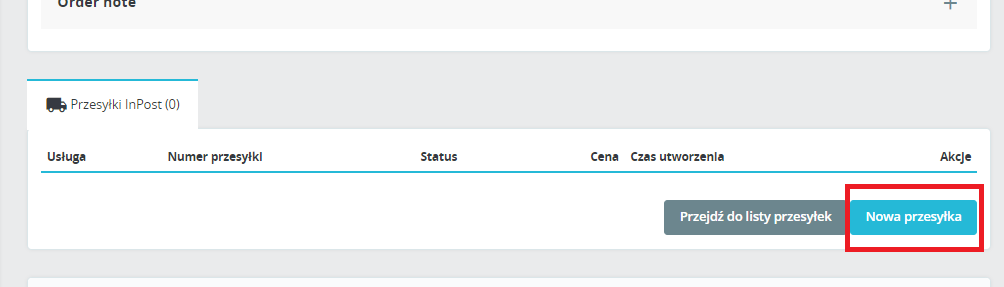
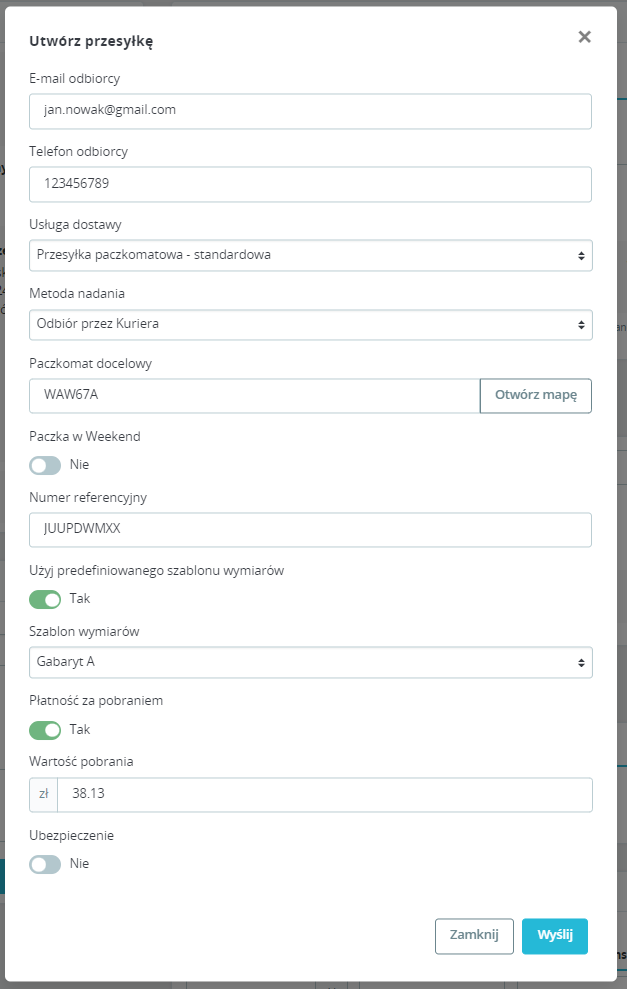
After clicking on the New Shipment button, a panel opens for editing the data provided by the customer as well as accepting them
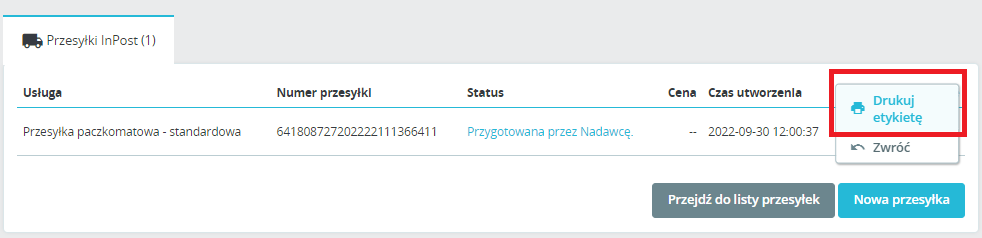
Printing and label format
Once the shipment is created, you can download the label by clicking Actions → Print Label
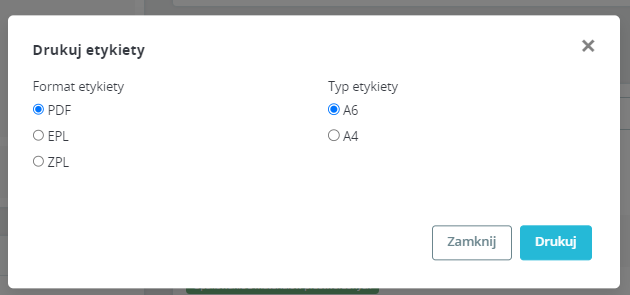
We have a choice of label formats:
Shipping service
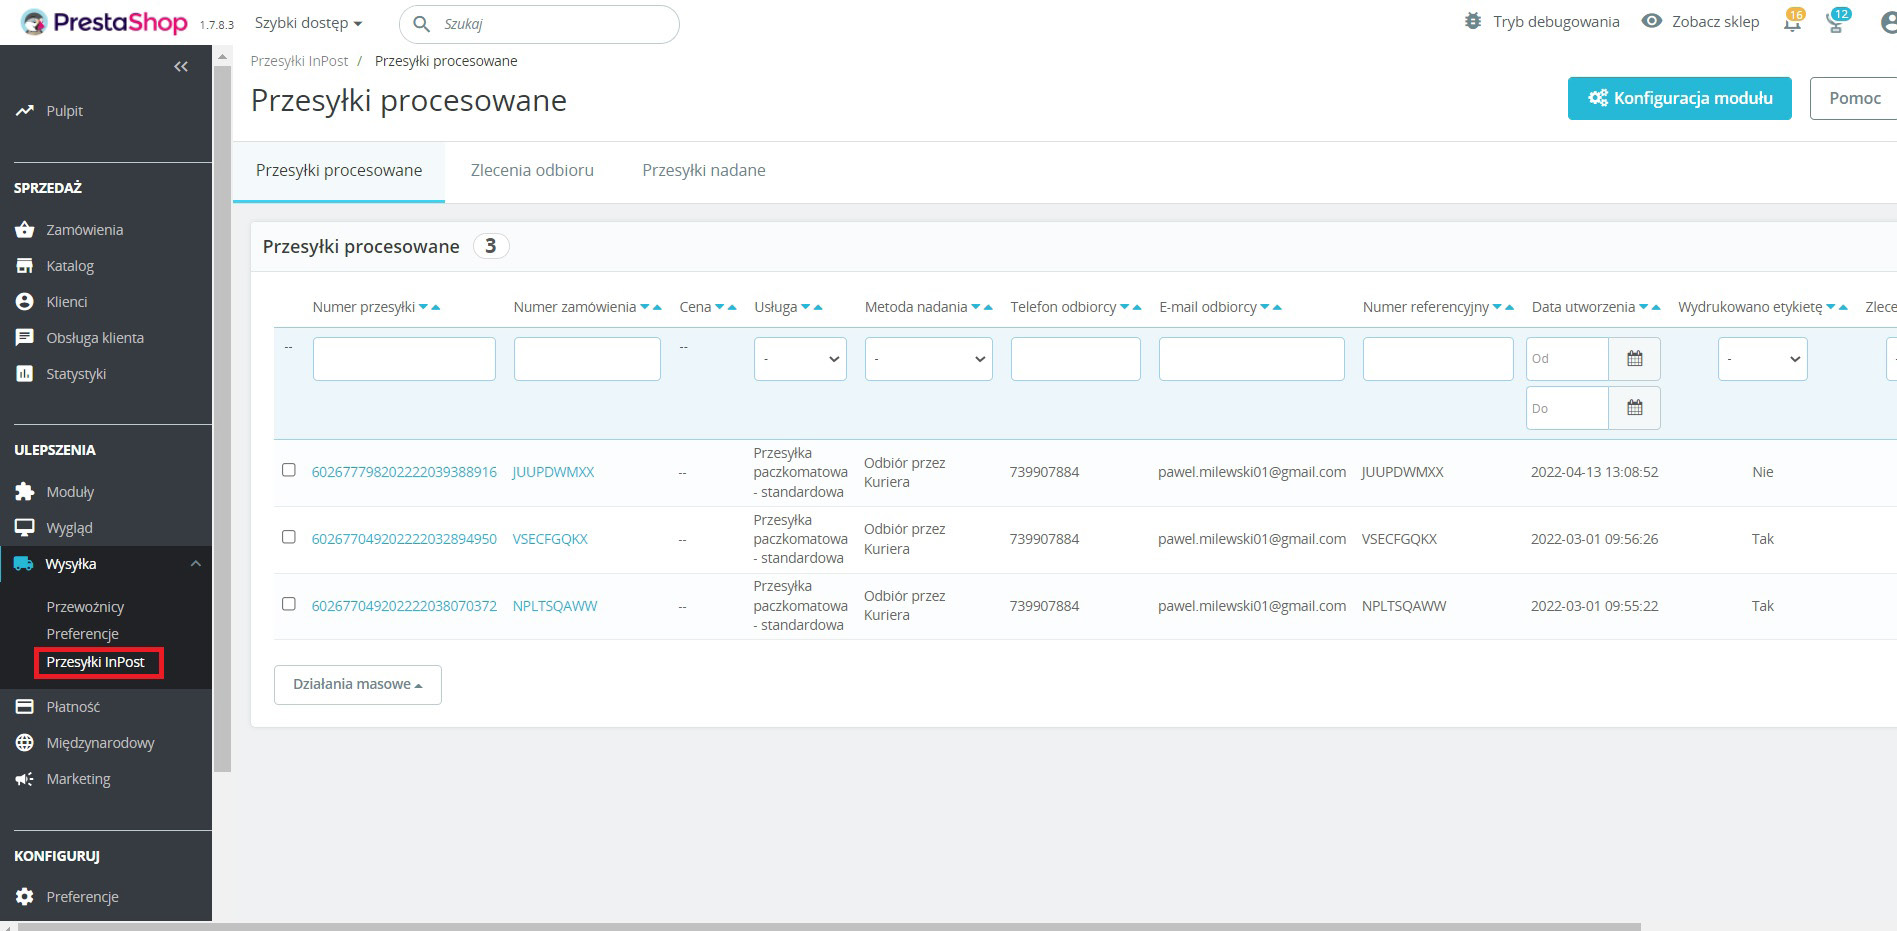
Tab - Shipping > InPost shipments
Here it is possible to handle and view drive-up orders, currently processed and shipped shipments, generate labels, create and print pickup orders
When creating a pickup order, we have the option of selecting a pickup point
Removal of consignments from Przesyłki Procesowane
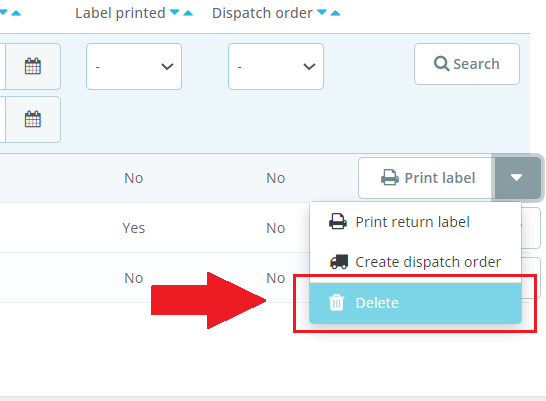
It is possible to remove shipments that have not been sent from the view in the Processed Shipments panel. This will help to tidy up the view of the current orders.
By clicking on the actions at the end of each consignment, the Delete option appears
| Note |
|---|
Important! Removing a parcel from this tab will not cancel the parcel. It will remain visible in Parcel Manager/WebTrucker |
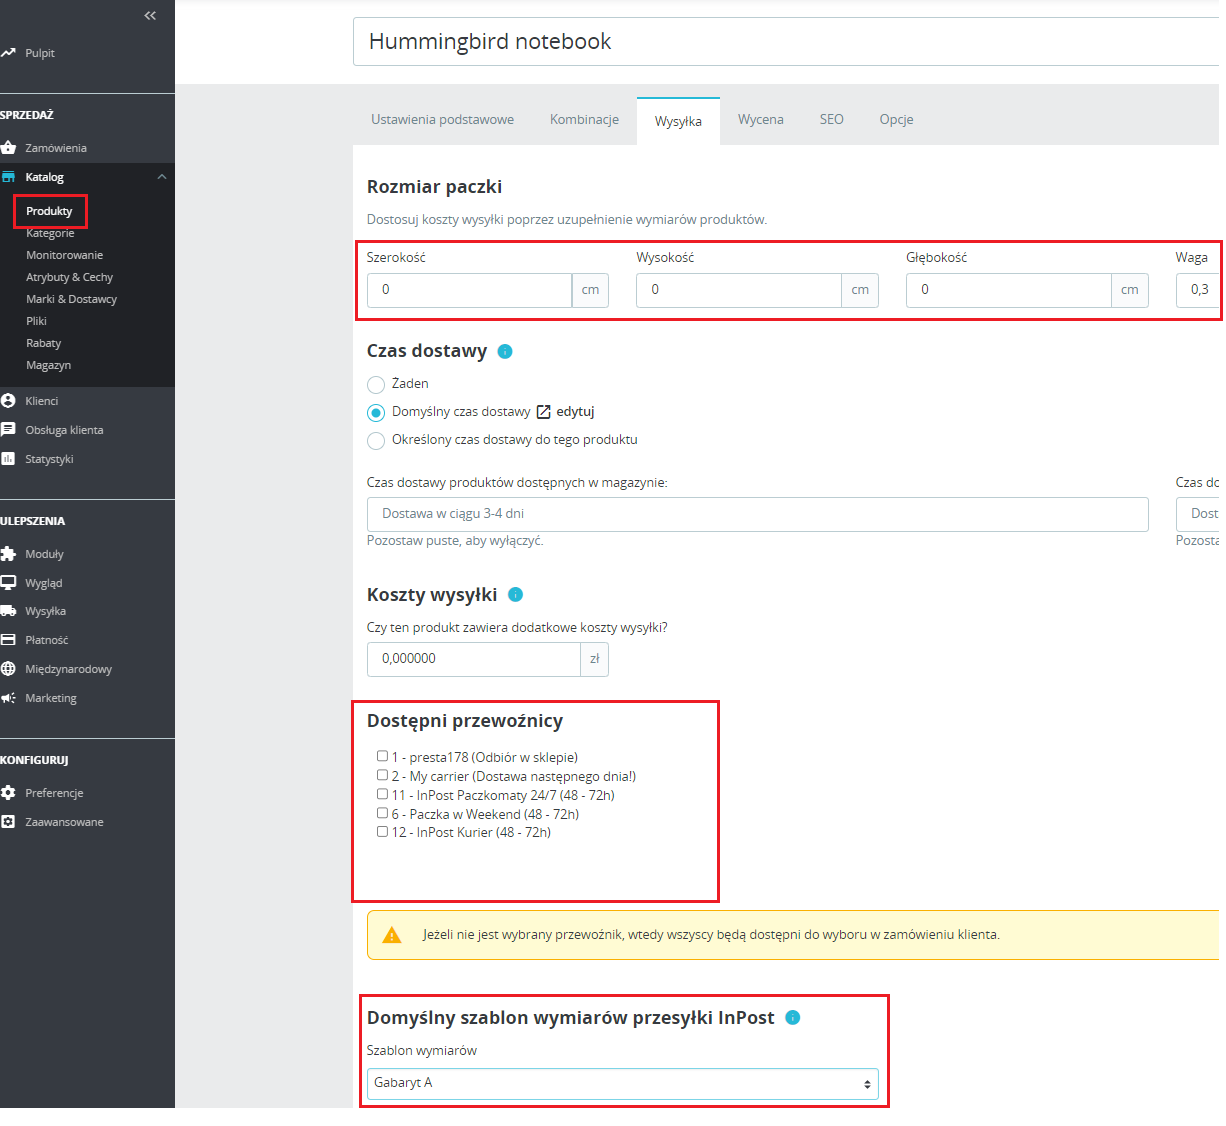
Products - templates
In each product there is an option to specify availability for a specific carrier and default shipment dimensions
This applies to Courier shipments (dimensions in cm) and Parcel Locker® shipments (Gabaryty)